At one point or another, we have all been asked to handle recurring tasks that we honestly didn’t want to do. We’re Ops folks! Isn’t our time better spent doing higher-impact work? Don’t fret, the days of managing those repetitive tasks over and over again are coming to an end!
Let’s begin where all good Ops initiatives start - the pain. Most of this stuff is valuable to your business, that’s why it hasn’t died in the past. It needs to be done, and done, and done, and done. But if you’re an Ops-minded person, you turn to automation to help solve these problems and get back some time in your schedule. That’s where HubSpot’s Scheduled Workflows enter center stage.
What are looping workflows?
At their simplest, Scheduled Workflows (also known as Looping Workflows) function on a set schedule, over and over again, until they are turned off or a record no longer meets the enrollment criteria. In the past, some have hacked their way to the same outcome using a series of workflows, properties, and checkbox triggers setting and clearing, ad infinitum. No more! This HubSpot feature is a quintessential tool to automate your high-volume repetitive business processes.
Even though we put absolute trust in the almighty HubSpot, we still need to do a bit of due diligence before we get up to our elbows in automation rules.
1: Validate Your Enrollment Criteria
Depending on the actions that you want to trigger, what you include on your enrollment criteria can have some major impacts! In our example, let’s say you run a cheesecake company and want to send a thank you note and downloadable menu to every customer who ordered from the past week. What are some of the questions that you need to ask yourself?
- “Are these folks expecting to hear from me?”
- “Is this message the right message to the right person at the right time?”
- “Will this deliver the same business value as when I do it manually?”
- “Do I currently have the data I want to use as enrollment criteria visible to HubSpot?”
Pro Tip: When using multiple enrollment criteria, keep a careful eye on "AND" versus "OR" criteria. Using the wrong modifier can drastically change the enrollment results.
2: Check Yourself (Before You Wreck Yourself)
Currently, Scheduled Workflows are only available to HubSpot subscribers with Operations Hub Professional or Enterprise access. If you have these levels, great! Skip ahead. If you don’t have these levels, spend a bit of time exploring the amount of time people just like you have spent completing these tasks. Feels like years right? The ability to create and maintain these Looping Workflows, depending on how you want to use them, might be just the ticket you were looking for.
3: Confirm Enrollment Criteria and Levels
Now that you're ready, let's build this thing!
- Navigate to Automation > Workflows in your HubSpot account
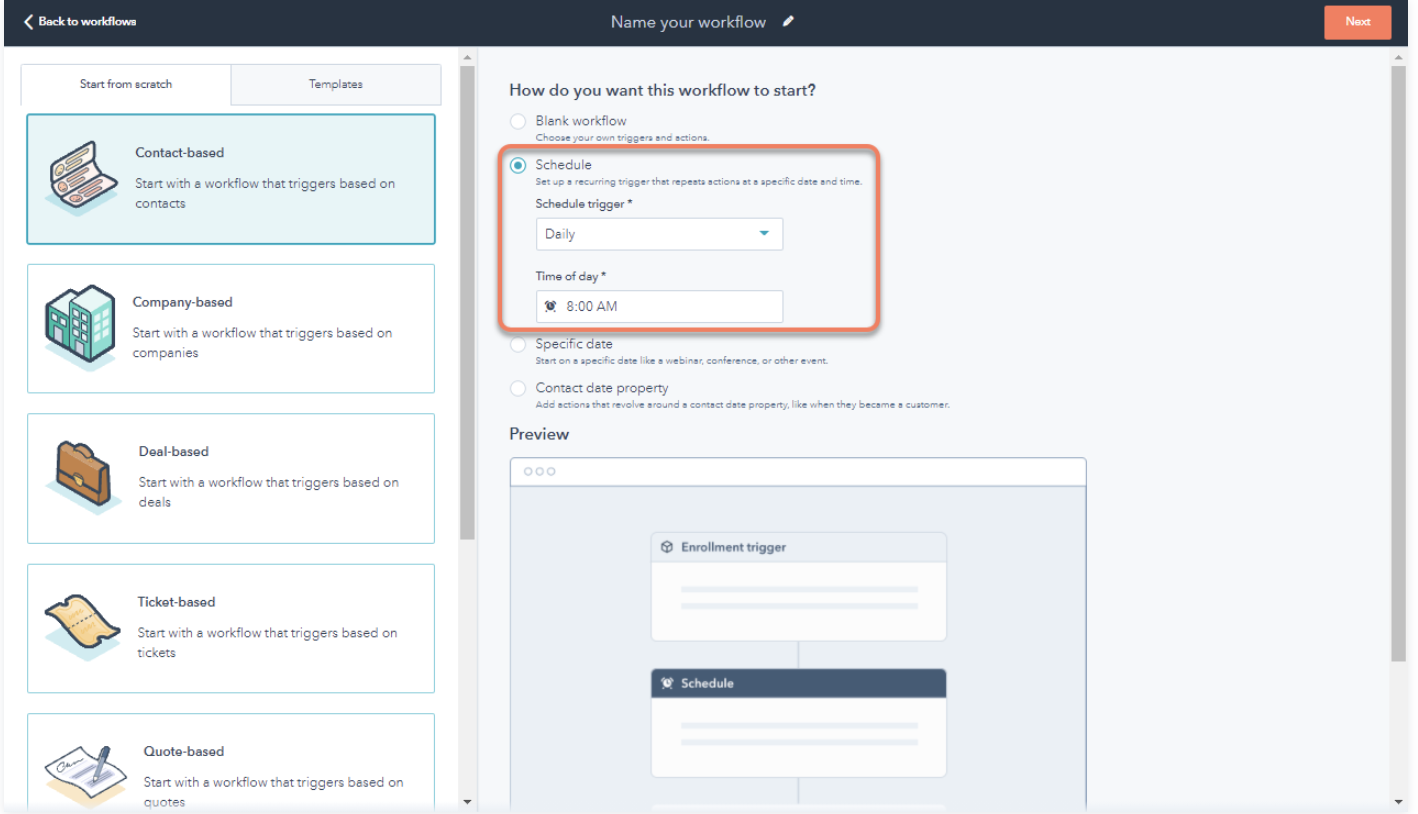
- Click Create Workflow in the upper right corner, and Start from Scratch
- Pick your object from the left-hand side menu and then select the “Schedule” radio select option. This will bring you to the options that pertain to your specific schedule (daily, weekly, monthly, and annually all have different specific options)
Let’s go back to our cheesecake example.
- First, you questioned and confirmed your enrollment criteria: All Contacts who have a Last Ordered Date within the last 30 days
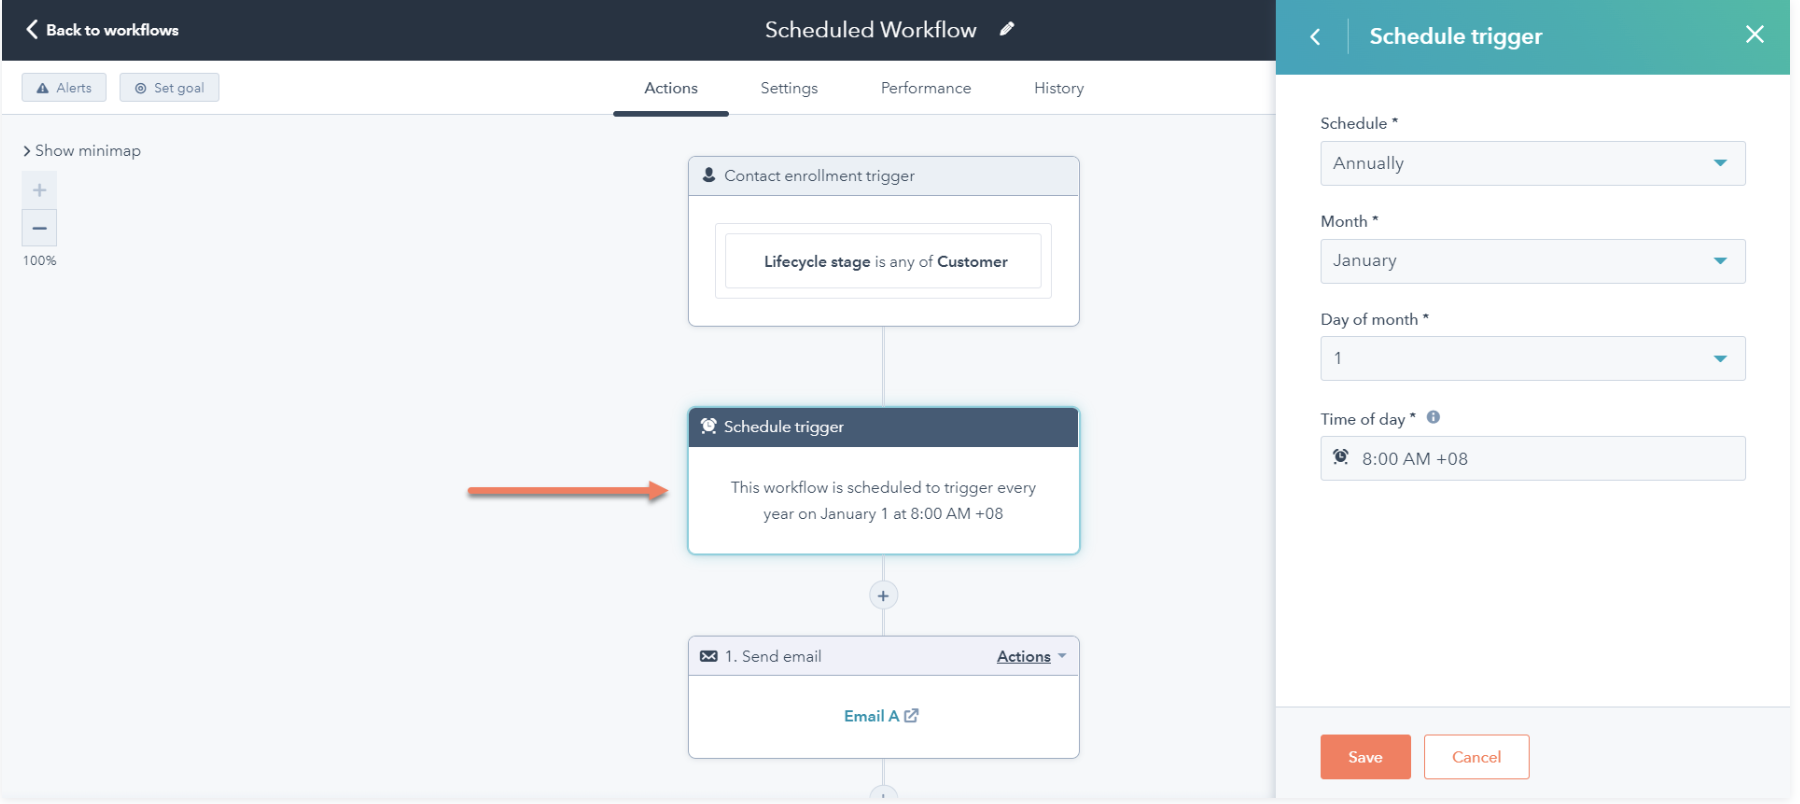
- Build a Contact-based scheduled workflow that triggers weekly on Friday at 2:47pm (cheesecake always pairs well with Friday). Pro tip: Try randomizing your trigger times (especially your email send times). Busy people have so many emails that hit their inboxes at 8 am every day, sending emails at random times may boost engagement and open rates.
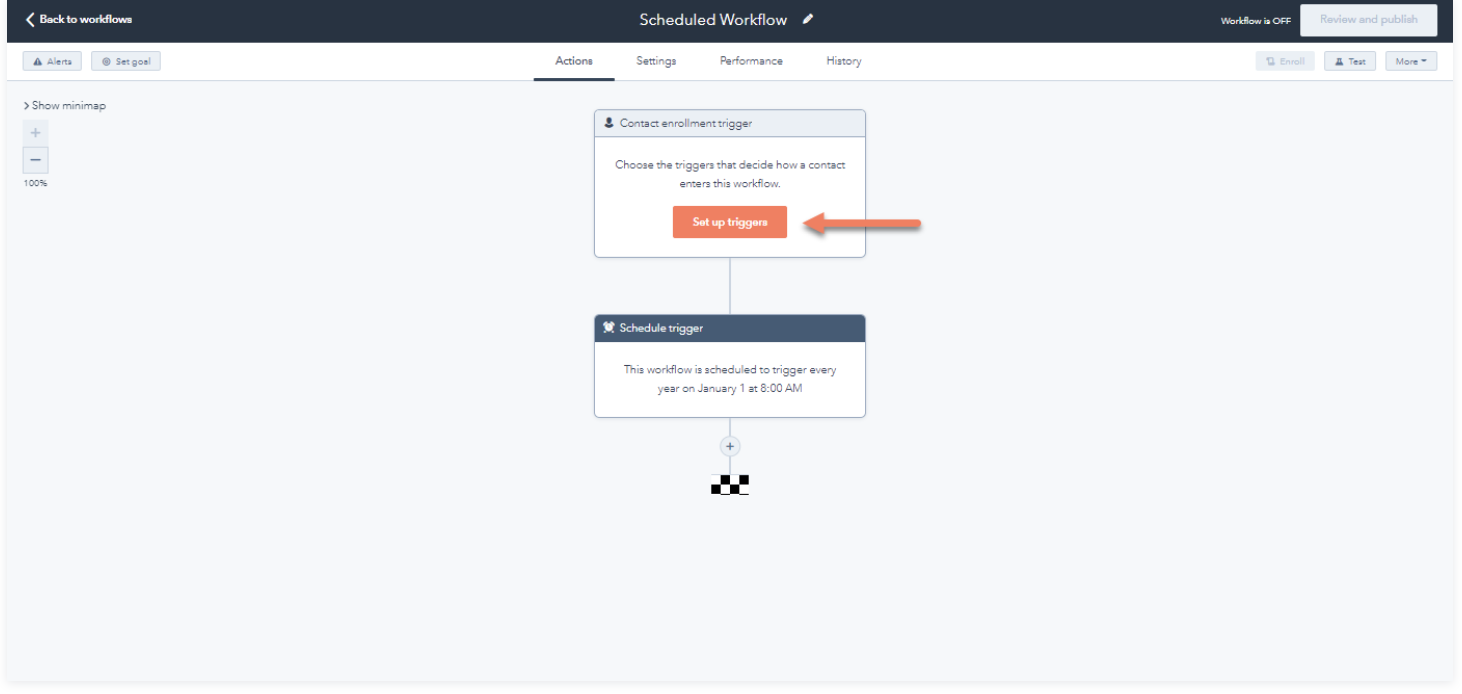
- Click Next in the top right corner to get into the same workflow creation screen you know and love, now we need to set up our enrollment trigger criteria. In our cheesecake example, we want to select a couple of Contact properties. First, we want to select Contacts where Last Ordered Date is less than 7 days ago and click Apply Filter.
4. Lastly, we’ll add our email-sending action. Click the plus icon to add an action and click the Send Email action under External Communication. Pick the “Weekly Customer Appreciation” email that you’ve set up and click Save.
Pro Tip: With workflows that send emails, randomly review your deliverability, open, and click rates. If you see a sudden shift in these metrics, it could mean your enrollment criteria need to be updated.
The Pros always review a workflow
Now, all we need to do is turn on our scheduled workflow! In the upper right, click Review and Publish. Two items to note when it comes to Scheduled Workflows:
- You can’t select New Contacts or Existing Contacts under the top enrollment section like you can with other workflows. When a Scheduled Workflow is turned on, it will trigger at the next scheduled time, enrolling all contacts that meet the enrollment criteria at that time.
- By default, when a record no longer meets the enrollment criteria, it will stay in the workflow but will not trigger your actions to be processed. If you’d rather remove the record from the workflow altogether when they no longer meet the enrollment criteria, be sure to make that adjustment on the review screen.
Once you are satisfied with your scheduled workflow execution days, your enrollment criteria, and your action steps, and you’ve reviewed the final settings of your workflow, you’re ready to publish your workflow! Click the Turn On button in the top right-hand corner of your screen.
Pro Tip: After turning on any workflow, run a couple of random tests on records that flow through it. Review enrollment history, action logs, etc to ensure that your workflow is functioning well.
Now you’re ready to enjoy a slightly over-generous slice of cheesecake! You can rest easy knowing that you’ve saved yourself time and crushed that recurring task for good.

.png?width=767&name=image%2032%20(1).png)